Best features in Xcode UI Testing
June 20, 2015
It’s that time of year again where iOS technology upgrade announcements are happening. In this post, I wanted to talk about UI Testing in Xcode 7. This new feature was introduced at WWDC 2015 as a great asset to the slowly improving testing capabilities in Xcode. Rather than give you a step-by-step tutorial, this time I just want to explain the best features in Xcode UI testing that should make you take notice.
1. UI recording does 80% of the test
With Xcode 7, you can now record interactions with your app and those interactions are converted into Swift code you can run and modify as much as you want. A type of UI recording was possible in the past with the UI Automator Instruments tool, but this was treated as a separate application outside of Xcode and weirdest of all, your interactions were converted to JavaScript. Having all this baked into Xcode will make UI testing much easier and more appealing to developers.
2. Automatic Screenshots right before events and failures
Xcode will take screenshots of your app at every significant event in your UI tests. For example when you tap on an element, scroll through a table view, or figuratively any UI action you can perform. I see this as primarily useful in viewing the state of your app prior to an assertion failure or invalid command. In addition, being able to see a “stack trace” of sorts can show what led to your success or failure. The following is a simple example of what you might see:

3. UI Testing is built into Xcode, not just Instruments
Not much more to say about this, but I’m happy it happened even though I wasn’t expecting it. One cool thing about having it built into Xcode is a cleaner project and cleaner source control.
4. Record more UI interactions at breakpoints
Say, after recording your initial UI test, you want to add some interactions. Well it’s easy to add taps, swipes, etc. by simply setting a breakpoint in the app state you want to add on to, putting your cursor in the place you want code to appear, then press the record button. Very easy stuff and saves you from writing small additions manually or just creating the whole test again.
5. Search for elements with NSPredicate
Apple went one step further with this one since you can already find elements by an accessibility identifier. With NSPredicate you can perform the same kind of queries you are used to, in the context of UI testing.
6. Integrating with CI Tool should be simple
In the WWDC talk, Apple encouraged the use of Xcode Server, stating integration should be easy. Although, I have not tested, I imagine it would be fairly simple to test with other tools like Jenkins or Travis CI since UI tests are just another target in the project and UI tests are setup very similarly to unit tests. In fact, the UI testing classes like XCUIApplication, XCUIElement, and XCUIElementQuery are all apart of the the same XCTest framework used in unit testing.
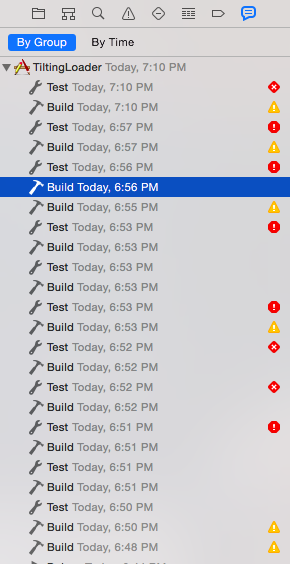
7. Report Navigator
Having a record of your testing as you go is such a useful feature, it speaks for itself:
That’s it for today, I hope you enjoy the usefulness of these new features as much as I will.
Tweet