Top 9 Storyboard Mistakes in Xcode
December 13, 2015
I know there are many who live and die by programmatic iOS development, but for those who use storyboard or are willing to try, here are some tips on what I’ve learned. What I’ve seen in watching people try to learn storyboard and auto-layout, is that there are many nuances that seem obvious to me, having used storyboards for awhile now.
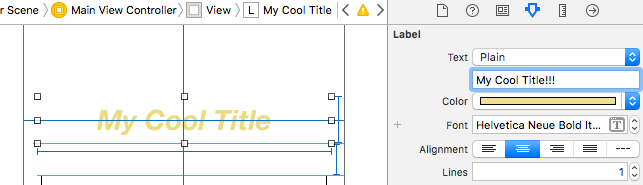
1. Update Your Label
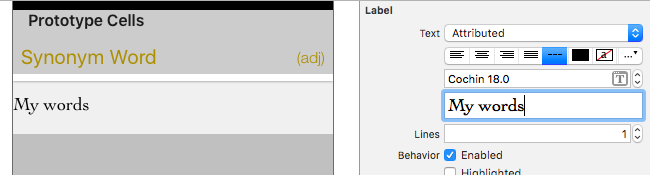
We’ll get more advanced, but this is a very basic mistake where you try to change the text for a UILabel in the attributes inspector, but fail to press enter so the label does not get updated. So make sure you actually updated your label by pressing the enter key. The picture below is an example of changing the title text, but not confirming the change.
2. Unchecking “Constrain to margins”
You’ve probably seen this little checkbox before, but never really knew what it was doing.
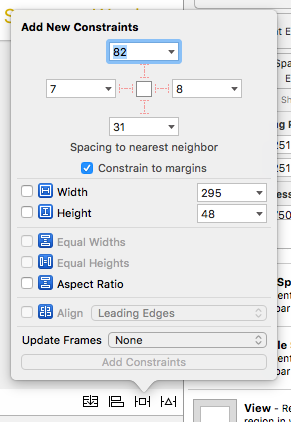
So you continue on, because why not constrain to margins, it’s already pre-selected. So yes, there are some benefits to using the margins in storyboard, like having a common element that multiple views are aligned by, as mentioned in this Stack Overflow post. Although, aligning to a common element is possible with some other UIView or UI anything, but they will be less constant in position than the margin. In my experience though, 96% of the time, I uncheck that constrain to margins checkbox. Most of
the time, I want my views to stretch to the edges of the screen on whatever device they are on. The main point here is that that checkbox can be useful, but most of the time developers leave it checked, unaware that it will cause odd looking UI because they never intended to constrain to margins.
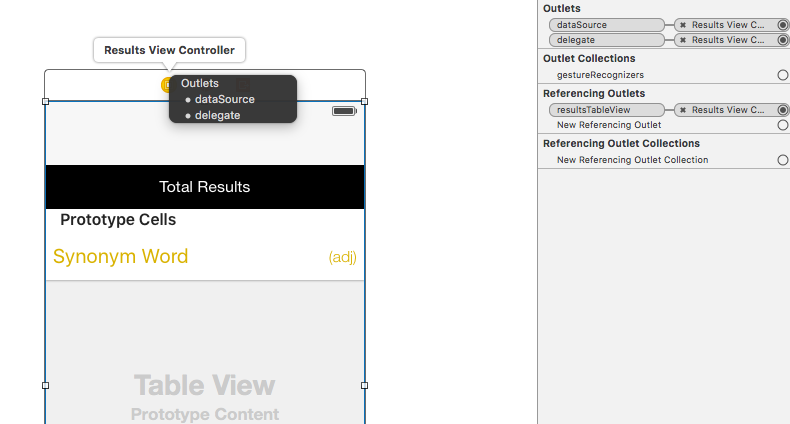
3. Forgetting to set your Delegate and Datasource
Ever wonder why your TableView, CollectionView, or any other view, adopting this familiar delegate/datasource protocol, was not being loaded with data. You then come to find that numberOfRowsInSection and cellForRowAtIndexPath is not being called. This leads to the discovery that you forgot to set your delegate and datasource in storyboard, like so:
This used to get me every time and I still forget to do it sometimes, but now, I realize almost immediately what I did wrong.
Bonus: On the topic of forgetting things, save yourself the trouble and don’t forget to set the TableView/CollectionView Cell Identifier so that you can properly instantiate that cell in code.
4. Not Properly Removing Storyboard Object References
When you remove a referencing outlet from storyboard, oddly enough, you can still build & run the app, but if you run any code that used that reference, the app will crash. When you do it the opposite way and delete the IBOutlet reference in code, the reference in storyboard will give you a very tiny warning:
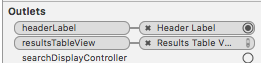
Here, resultsTableView doesn’t have a valid code reference, which will of course, cause issues later. We simply need to remember to remove both references if choosing to remove one.
5. Using One Storyboard for Large Projects
Apple has made this as easy as possible now, with Xcode 7 and Storyboard References. The problem for many in the past is that you start to get over 10 or 20 View Controllers and your one storyboard becomes hard to manage. Meaning, you can’t easily find what you are looking for and the file itself takes longer to load. In addition, the likelihood of a merge conflict increases when you have many people working on one storyboard. That said, even if you are just working alone, it really helps with organization. Honestly, it seems natural, because we as programmers have very particular ways of organizing our code so why wouldn’t we at least have some way of organizing our UI.
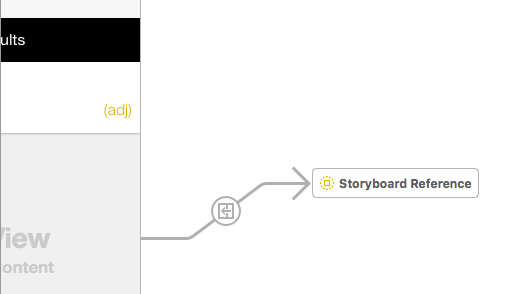
Oh, just so I’m consistent, here is a screenshot of what Storyboard References look like:
6. Custom Fonts on Attributed String Reset at Runtime
This mistake is a little more rare and may not come up very much, but it was perplexing for me at first. The issue happened when I had a UILabel, I set the attributed text and custom font that was imported into the project (I believe it was Lato).
Everything seemed to work fine until runtime when my attributed string reset to the default system font. I had no idea why and still don’t really know, but in this case, custom fonts don’t work directly on storyboard. So 2 solutions is to just reset your font on that string in code, or use an IBDesignable class, as the this Stack Overflow post suggests.
7. Debugging AutoLayout Constraints Without Using Identifiers
I know many of you have come across the following issue:
Unable to simultaneously satisfy constraints, will attempt to recover by breaking constraint
And then you are given a list of constraints, that could be causing issues, in a not very human readable form. In order to make this debugging process easier, I suggest you at least give all possible issue causing constraints, an identifier:
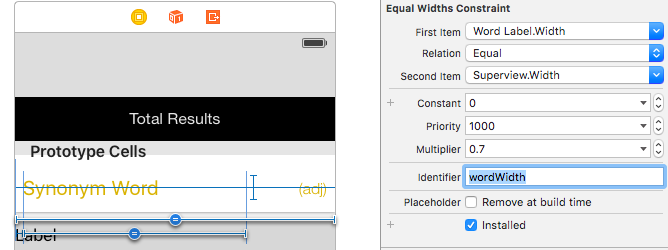
Identifiers on auto layout constraints is relatively new, but has been around awhile. It has certainly helped me figure out my auto layout issues and I hope this little tip helps you. For more info on using identifiers, check out this post on Use Your Loaf.
8. Not Testing on Multiple Screen Sizes
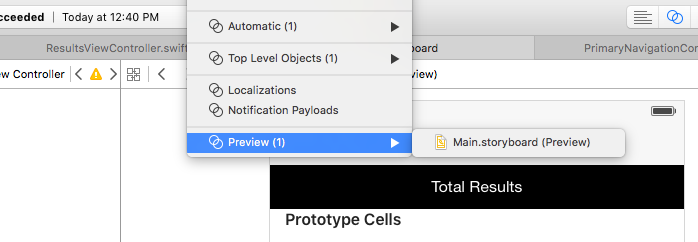
It’s easy to get your 4.7 inch iPhone 6 screen going in storyboard and never look back. The issue is you design your constraints for one screen and assume it should work well for all screens. The truth is, thats not always true since there is a large difference between a 4S and a 6 Plus. The key here is to, of course run on all different simulators (including iPad if you support that), but you can also test certain layouts quickly in storyboard. In Assistant Editor mode, you can select preview to get a rendering of the current screen you are working on in whatever size you want to view it in. The dropdown looks like this:
Using my Nyms project, as in all the screenshots here, I can show the full result:
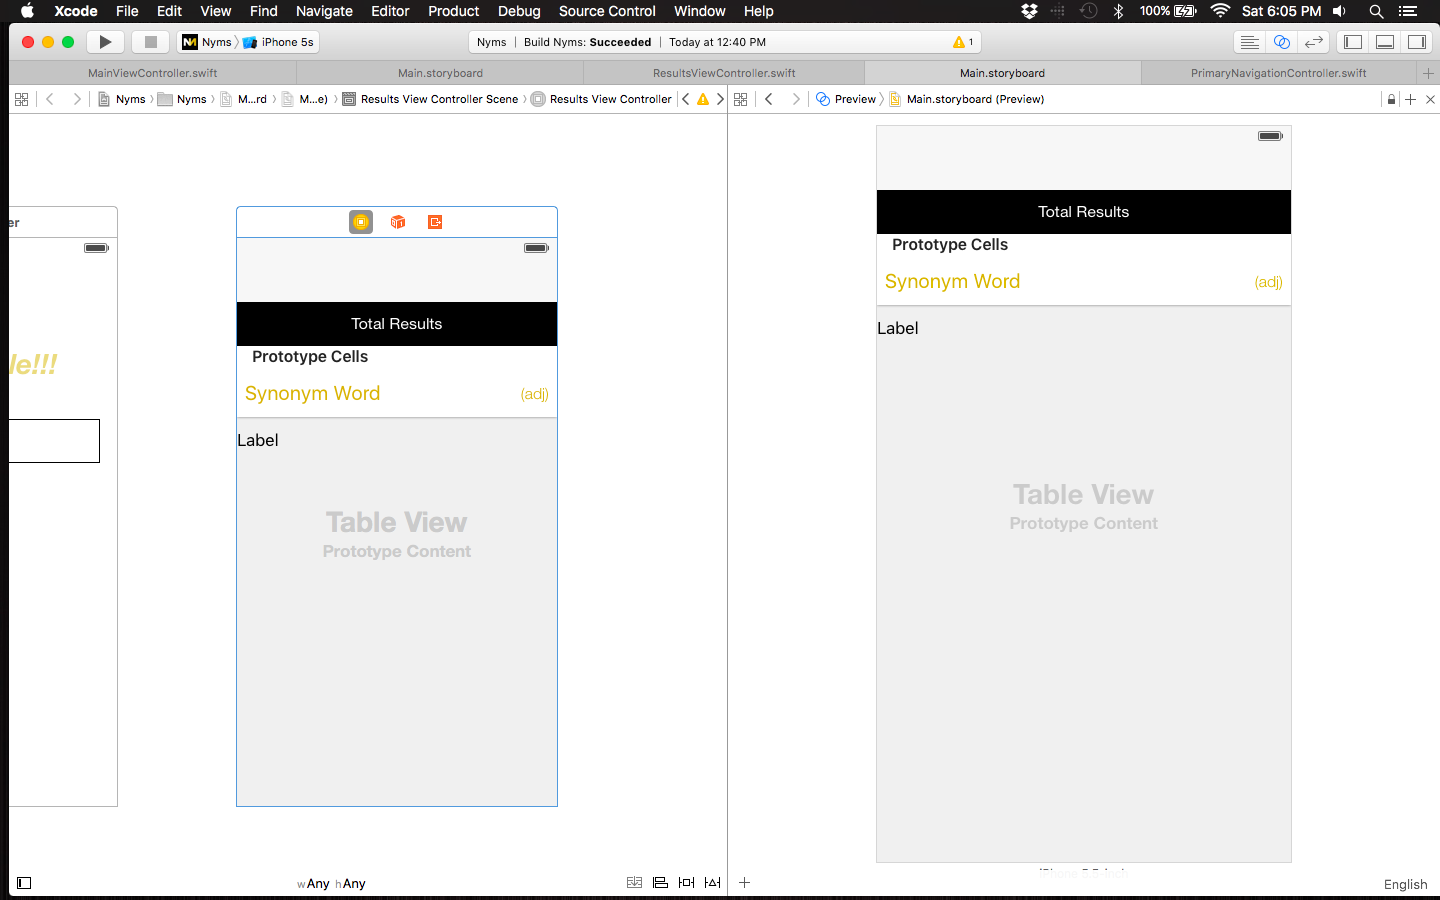 I have a 4 inch iPhone on the left and a 5.5 inch iPhone on the right.
This example is not super compelling, but you see the effect. In addition, any changes you make on the left will immediately be reflected on the right. One more thing I’ll mention for supporting multiple screen sizes is Size Classes, which will truly allow you to develop for all iOS screens in one storyboard.
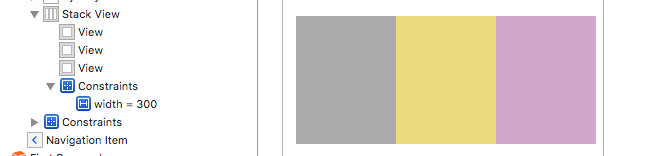
9. Not Taking Advantage of UIStackView
UIStackView is new with iOS 9 and it fixes a lot of layout problems developers have had in the past. That problem is, how do you space multiple views perfectly across a screen? In the past, there was no good solution, causing developers to do odd workarounds. For example, you have 3 views that should be evenly horizontally spaced, so you put them all on a new parent view and have one hug the left, one hug the right, and one centered in the middle. This works great, but gets more complicated the more views you have to deal with. So please, use a vertical or horizontal stack view to space out your views. Here is a simple example:
Last Thought
It’s easy to make comparisons of Xcode with other mobile IDEs, but I must say storyboards have gotten better over the years. Some improvements I’ve seen are, in the way you add constraints to support many screen sizes and also the amount of customization allowed on each UIKit component. Thanks for reading and please let me know any mistakes you’ve made in storyboard and the fixes to combat them.
Tweet